Blog
Manual Blending versus HDR
8/01/11
There are times in Landscape Photography when there is a wide dynamic range present which is difficult to capture with a single exposure. Especially at sunrise and sunsets, the sky may be many stops brighter than the foreground. If you expose correctly for the sky, then the foreground is underexposed and often just a silhouette. If the foreground is correctly exposed then the sky is blown. Of course this may be exactly the effect(s) or look you are after.If it isn't then there are many methods to deal with this. You can use graduated ND filters, or blend exposures. Most DSLRs have an automatic exposure bracketing function which allows you to take 3 or more photos at different exposures, by varying the shutter speed (while keeping the aperture constant so DOF is consistent).
You then have the option of blending these exposures together, either via a HDR program (Photoshop, Photomatix, Dynamic HDR etc.), or manually. Manual blending involves opening a number of images together in your editing program, and brushing in the parts of one photo into the other (e.g. brushing in the bright foreground of an overeposed shot, into the silhouetted foreground of a photo exposed for the sky).
There are advantages and disadvantages of both approaches. Manual blending allows a much more natural appearance, and is suited to landscapes in particular. HDR if done properly can look quite natural, but more often than not the processing can be overdone, particularly the tone mapping. At times this can be a deliberate ploy to get the "HDR look", and this is now a common, and almost the default look in real estate and car marketing photography.
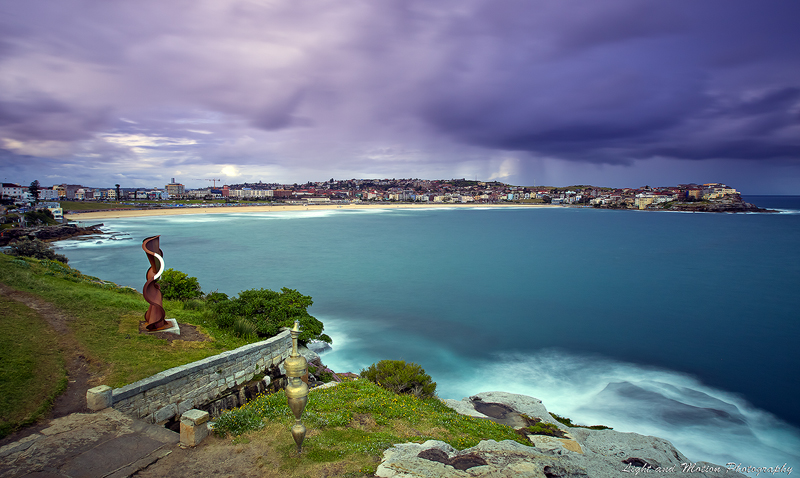
The first photo is a manually blended exposure with some editing, cloning and cropping for composition.
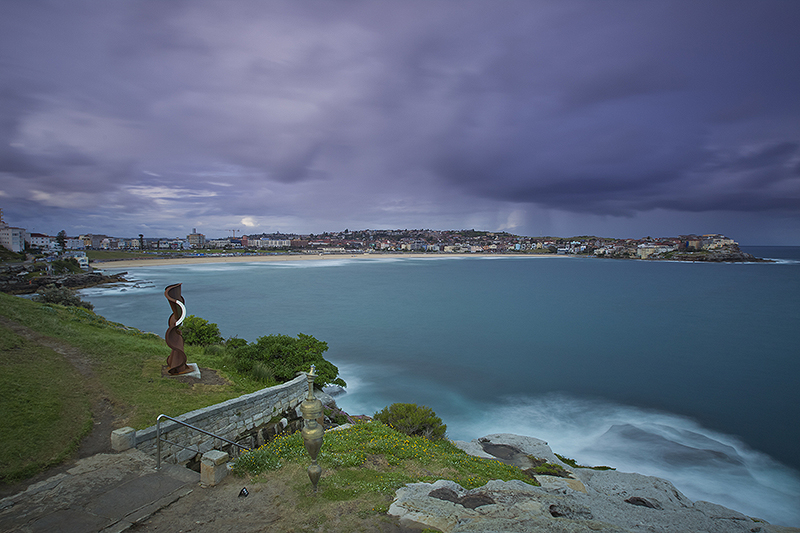
The second is the raw capture.
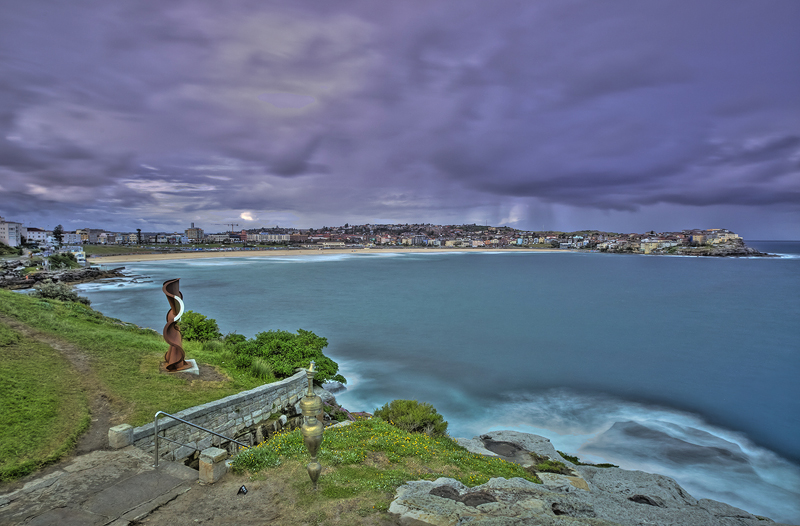
The third is a HDR of 3 exposures (0, -2EV and +2 EV), which has been overprocessed with regards to tone mapping.
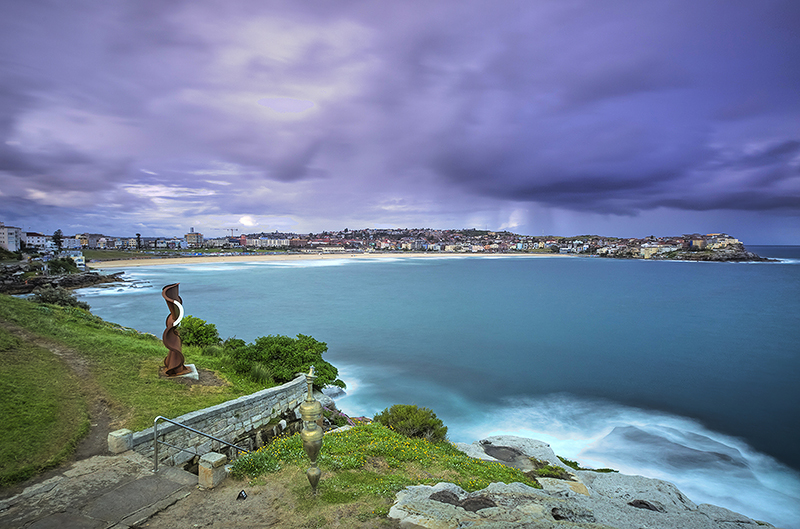
The Fourth is a HDR with more subtle processing but it still has the HDR look. For this landscape, I prefer the blended exposure due to its more natural appearance, but each to their own.
I do have a preference however for HDR and Photomatix tone mapping for some cityscapes.
The 5th photo in this album is a HDR of Notre Dame de Paris.
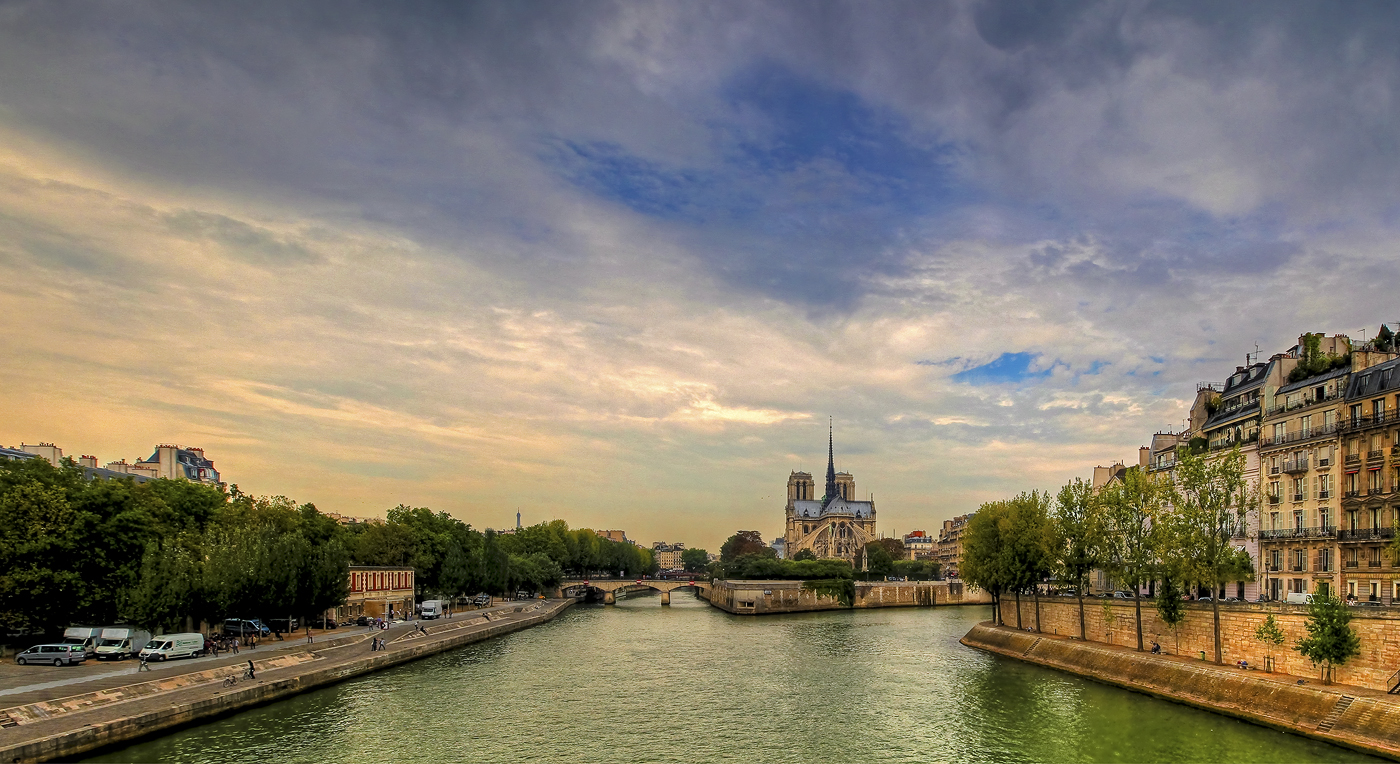
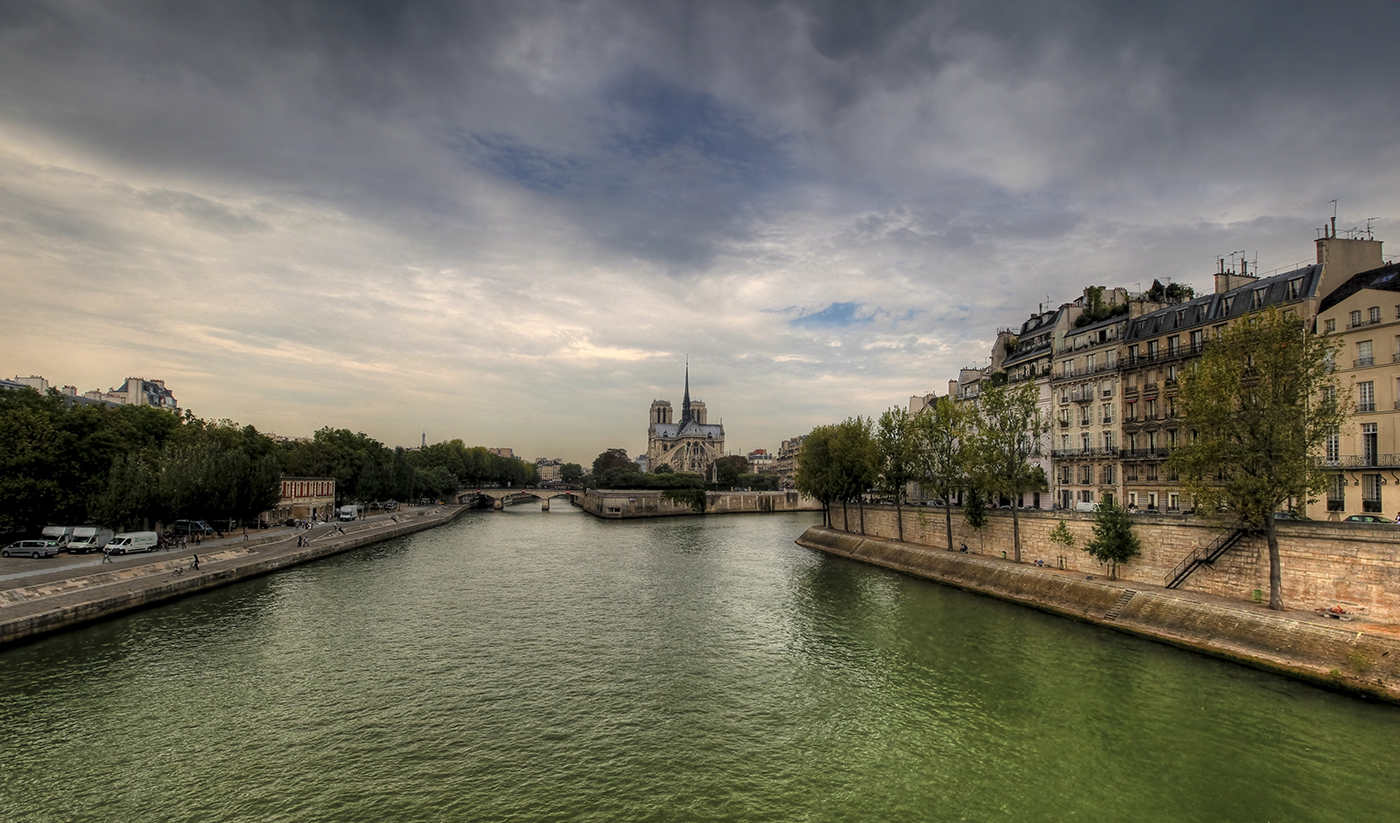
The tone mapping in Photomatix has given the scene a watercolour/painting like feel, which I prefer to the single exposure shot as depicted in the below photo.
There are no hard and fast rules. Experiment with both techniques and see what you prefer.
Lastly to do AEB properly you'll need a tripod to prevent slight movement between exposures. One way to get around this is to shoot one photo in RAW, and process it multiple time in your RAW program (eg. Adobe Camera Raw). This will prevent movement artifacts and ghosting if a tripod is not handy.
Comments (click to expand)